


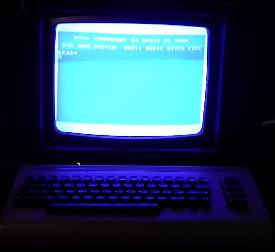
Bring back the C64 experience with just a C64 keyboard and shell. No more physical floppy drives or 5¼ inch disks!
My first real computer was a C64 purchased in 1985, but regrettably I sold all my C64 hardware in a garage sale 10 years later. Almost 20 years later I've finally found the perfect way to bring it back to life — in a way that almost makes you forget you're running it on an emulator!
Documented and Tested by John A. Reder — August 2014
Hardware
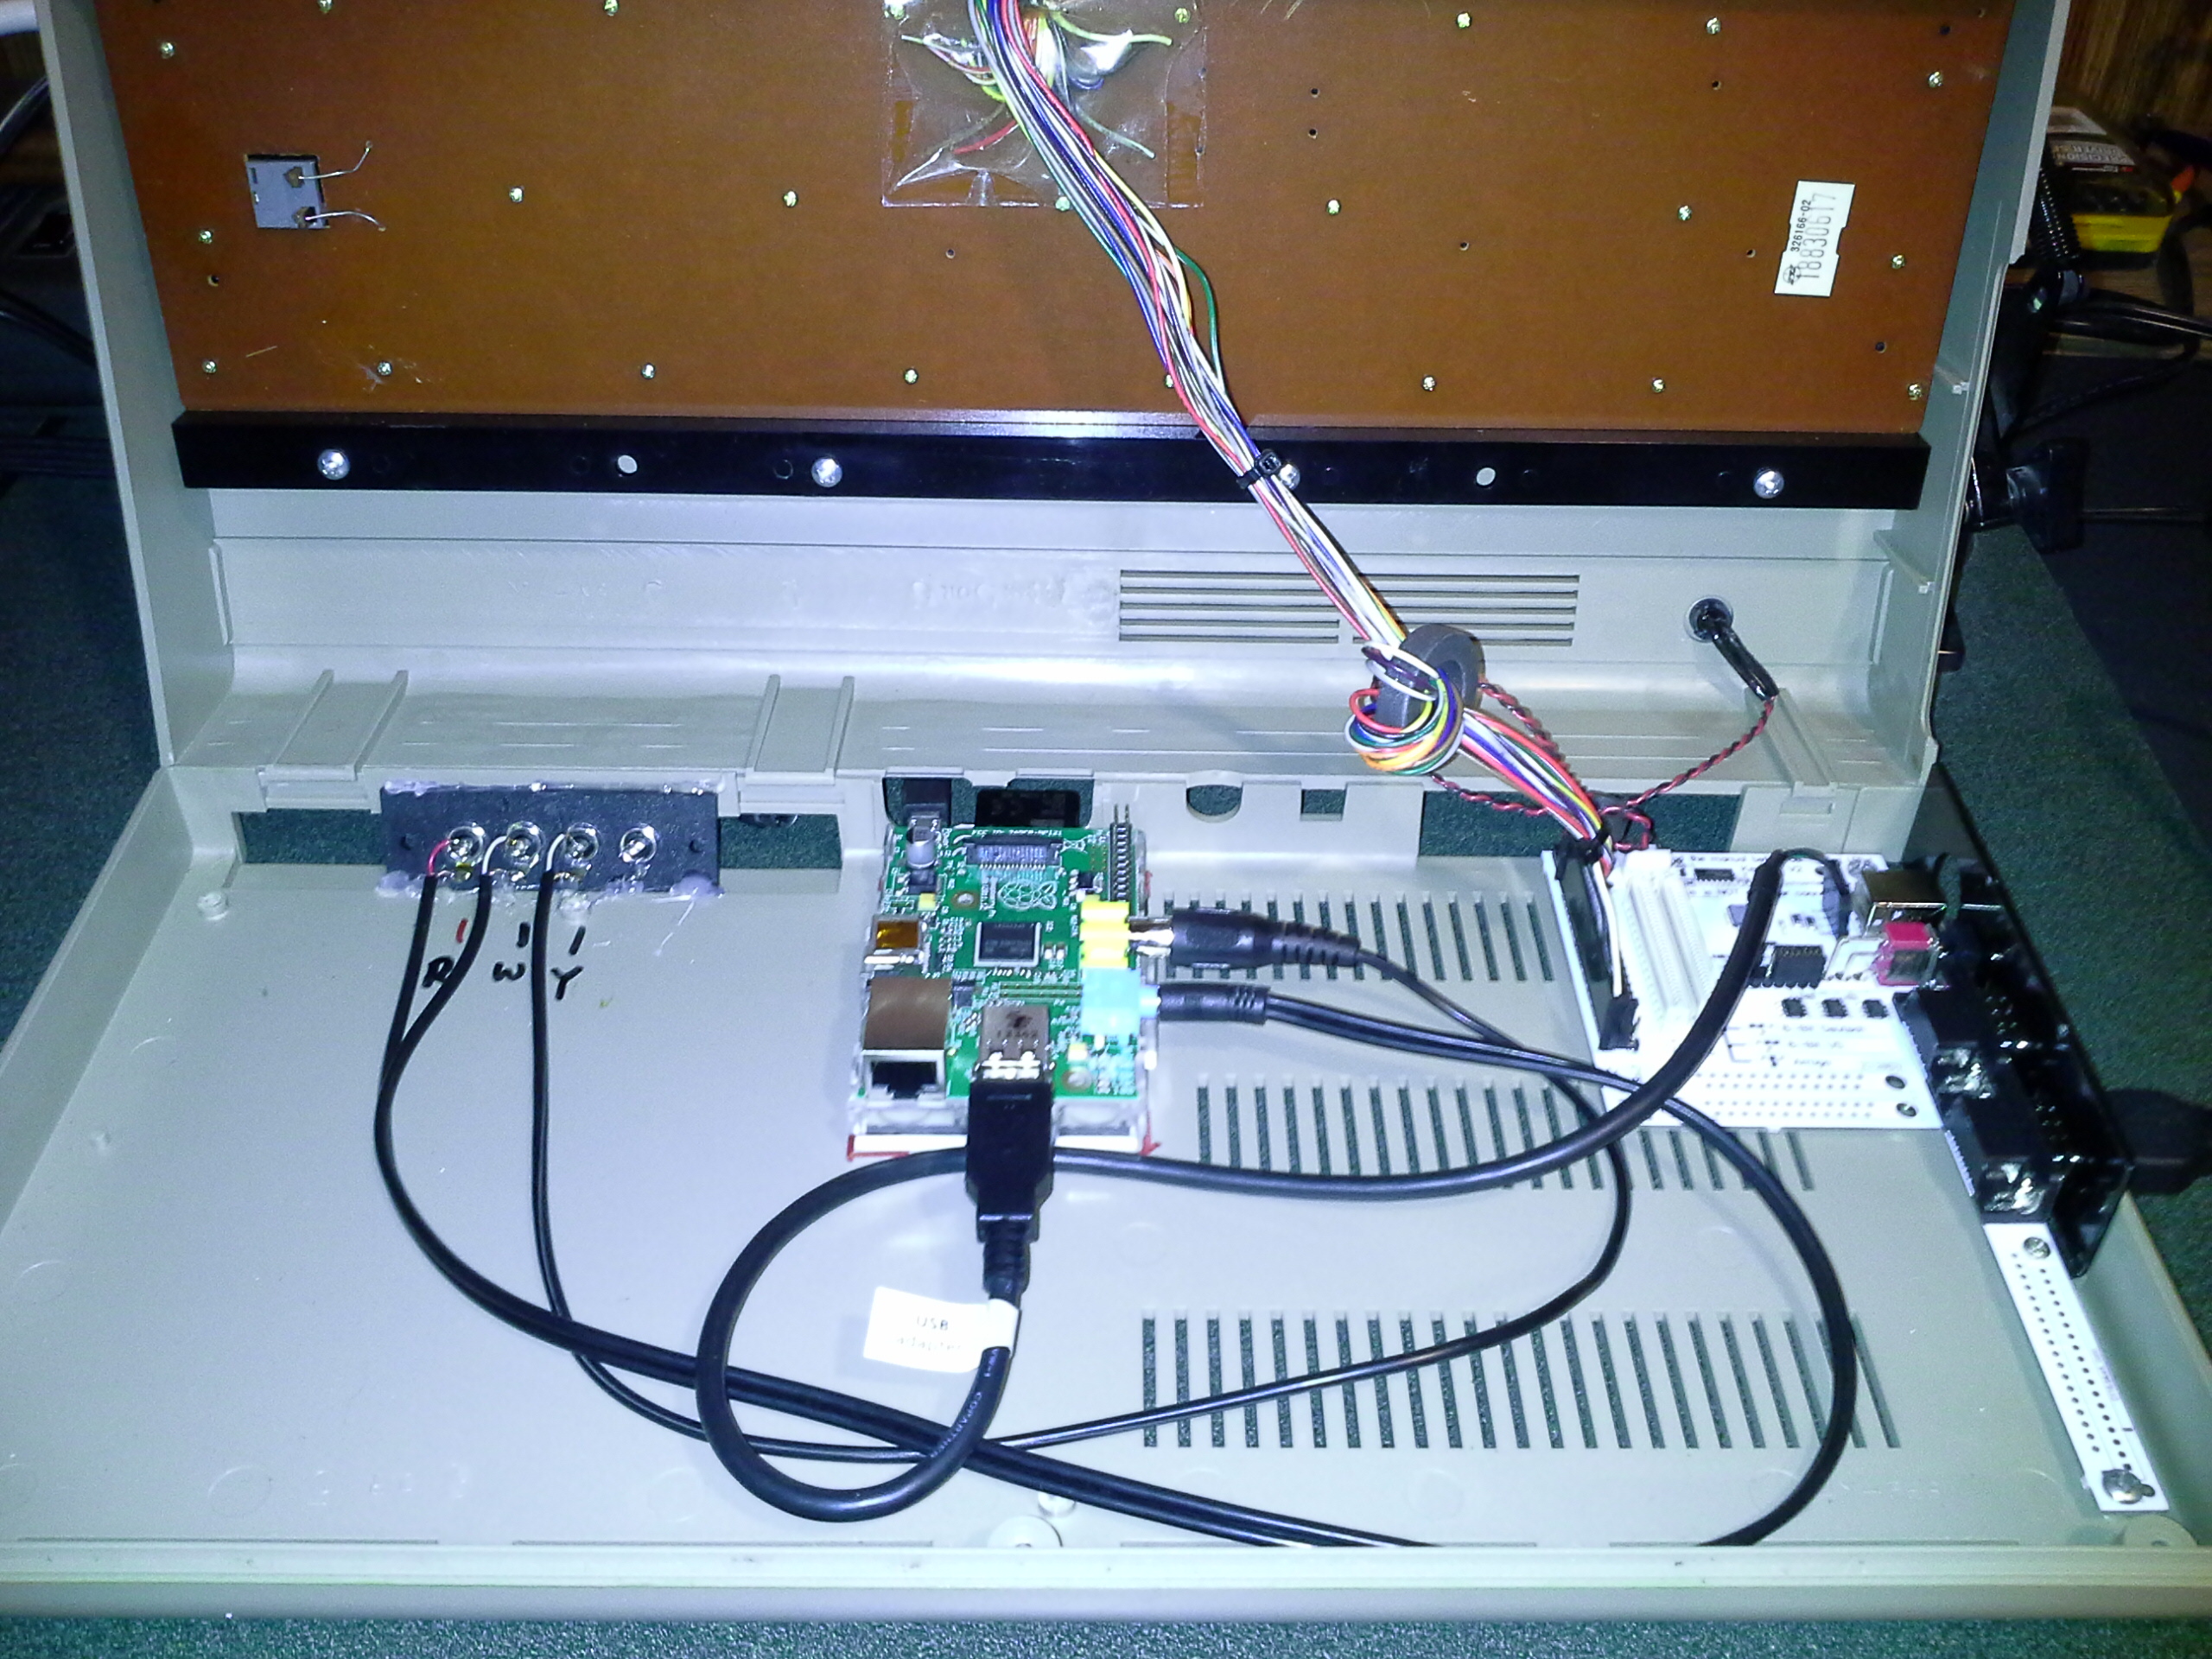
(A) Classic C64 'Bread Box' style computer — only the keyboard, LED cable/connectors, and metal side joystick port panel are needed. Even one with a bad motherboard works ($10–20 on eBay). Remove the internal motherboard.
(B) Keyrah v2 (no external USB cable needed — select the cheaper option). Keyrah Product Link
(C) Raspberry Pi Model B — fits easily inside the C64 shell. Mount with a Pi case bottom half and thick double-sided 3M tape or hot glue.
(D) Raspberry Pi-compatible 5V 1A AC adapter with micro USB plug.
(E) 4GB SD card
(F) Standard joystick from that era (Atari 2600 joystick works great)
(G) USB internal extension cable — remember the black wire is ground when soldering.
(H) RCA 4-port jack panel (3 ports needed) — hot-glue into place.
(J) 3.5mm audio jack cable with Y-splitter to Red/White (L/R) RCA channels.
(K) RCA male cable for Video (Yellow) port.
Software
Use the PiMAME image with VICE pre-installed. This example uses PiMAME 0.7.10. PiMAME.org
- Write the PiMAME image to your 8GB SD card using Win32DiskImager.exe.
- Edit
/home/pi/.profile— add command to route sound to the 3.5mm audio port. - Edit
/home/pi/.profile— remove PiMAME menu launch; replace with directx64launch for VICE. Add before thex64entry:sudo amixer cset numid=3 1 - Edit
/etc/init.d— comment out the PiMAME intro movie line for faster boot:#omxplayer /home/pi/pimameintro.mov
Configuration
- Keyrah v2 C64 emulation mode is active when the red LED is lit on the keyboard.
- Launch VICE configuration by pressing F12 (works with a standard USB keyboard alongside the Keyrah).
- Connect joystick to Keyrah (either port — Port 1 preferred).
- In UI settings, remap config menu navigation to the joystick:
- Launch = Pound key (£)
- Cancel = Left arrow key
- Exit = Run/Stop key
- In Machine settings → Joystick settings → Define Keyset, enable Port 1 to Keyset 1 and Port 2 to Keyset 2.
- Save configuration (optionally save as
settings1for use with the-configflag). - Disconnect the standard keyboard — the C64 keyboard and joystick now fully control VICE.
- Install ROMs in
/home/pi/roms/c64. Use FTP (login:pi, password:raspberry) to upload. - Button up the C64 (3 screws on bottom) — ready to play!
Hints
- Load a ROM — Press £ to open the config menu and select the Autoloader option.
- Speed up loading — Turn off Real Drive Emulation in the drive settings menu.
- Default ROM folder — Launch VICE with the
-configparameter:sudo x64 -chdir roms/c64 -config roms/c64/settings1 - Backup your SD card using Win32DiskImager.exe — read it into a file on your PC.
- Capacitor C6 — Located just behind the micro USB port. Be careful when plugging in — easy to knock off. The Pi works without it, but use a surge-protected power strip if you have dirty power.
- Reset button — You can wire a normally-open (NO) reset button to the Pi's reset header holes.
- RCA jack panel colors — Use markers to color the white plastic jacks.
- Orientation — Mount the Pi so the power and SD card remain accessible after the case is closed. You may need to cut the plastic between the two C64 serial port holes to create a Pi-friendly opening.
- Extra ports — HDMI, 2nd USB, and RJ45 extension cables can all fit inside the spacious C64 shell.
- C64 ROMs — Search online ROM archive sites for your favorites.


© 1996-2025 John A. Reder